1. Park your vehicle on a level surface, and engage the parking brake. If needed, jack your car up and place jack stands underneath it. Never get under a vehicle that is supported with only a jack! Use wheel chocks to help prevent wheels from rolling.
2. Open the hood of your vehicle and locate the engine oil dipstick and remove it. (This helps the oil flow when draining).
3. Once your vehicle is safely lifted, put on eye protection, crawl under and locate the engine oil pan. (See your vehicles Owner’s Manual for reference).

4. Locate the drain plug, a long bolt head at the bottom of the pan. (Some vehicles may have two drain plugs).
5. Position a container under the drain plug to catch the oil when it flows out. (Make sure the pan is large enough to hold all the engine oil).

6. Loosen the drain lug using a box-end wrench or a 6-pt. socket. Carefully remove the plug by hand, while making sure the catch container is still in place. Oil will flow rapidly, but may take several minutes for all the oil to drain out. Be careful! Oil may be hot!

7. Clean and inspect the oil pan threads, oil drain plug(s) and oil pan for any wear. Purchase new parts if you have any concern about the condition of the parts.
8. Once the oil has completely drained from the pan, reinstall the oil drain plug and tighten with the correct box-end wrench or 6-pt. socket to the manufactures specified torque, found in the Owner’s Manual.

9. Locate the oil filter. If the old and new oil filters are not the same, double check your Owner’s Manual to be sure you have the correct filter.
10. Position the oil catch container under the filter to catch any oil residue remaining inside the filter.

11. Loosen the oil filter with the correct oil filter wrench, and allow the oil to drain from the filter.
12. Remove the old filter and check to make sure the gasket has come off with the filter. If it did not, remove it and clean up any residue on the engine mounting plate.

13. Place a light coating of new oil on the gasket of the new oil filter so it will install smoothly. (Do NOT use grease!) By hand, install the new oil filter onto the engine by turning it clockwise. Once the oil filter gasket first contacts the mounting plate gasket surface, tighten the filter according to the directions on the new oil filter instructions.

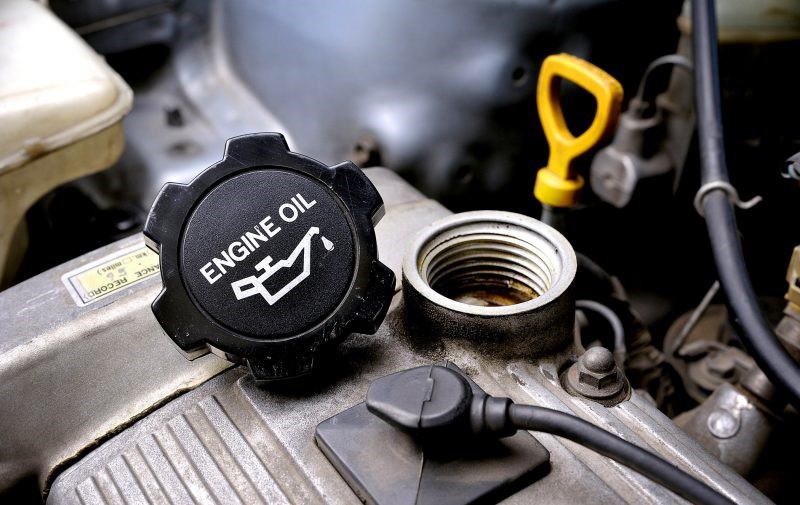
14. Under the hood, remove the oil filter cap and pour in the correct amount of new motor oil. Use a funnel to minimize spills. When finished, replace the cap and tighten.

15. Start your vehicles engine and run at idle for a minimum of 30 seconds. Carefully inspect under the hood and under the vehicle for any visible oil leaks. If leaks are visible, shut off the engine immediately and repair the leaks.

16. Shut off the engine and safely lower your vehicle back to level ground.

17. Install and remove the oil dipstick and check for proper oil levels. Add more oil if necessary.

We hoped you learned a little more about how to change your car’s oil safely and correctly. Educate yourself on the correct techniques, tools and processes needed when embarking on an automotive project, and remember to have fun! If you’re looking for your next auto project, start bidding in our online car selection to find a great deal!
Copyright © VSBrothers.com 2016 All right reserved


